In This Article
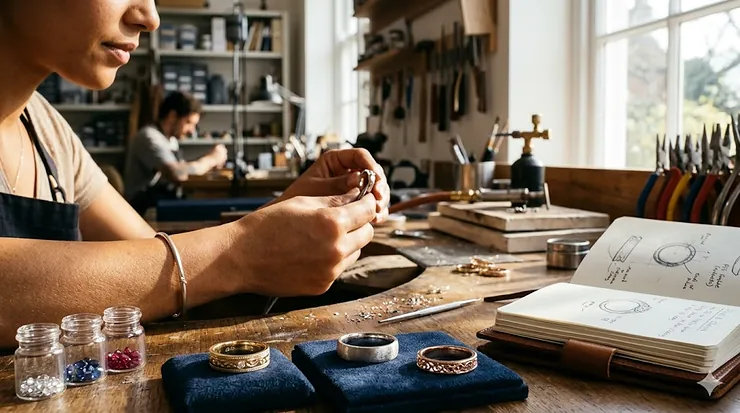
Creating your own band ring isn’t just a trend—it’s a revolution in personal expression. Whether you’re crafting a wedding band that tells your love story, a memorial piece honoring someone special, or simply want jewelry that no one else owns, the ability to design your own band ring has never been more accessible. The global jewelry market has shifted toward personalization and handcrafted pieces, reflecting growing consumer desire for meaningful possessions over mass-produced items. In my years covering jewelry crafting, I’ve watched the custom ring market explode from niche hobby to mainstream obsession, and 2026 is shaping up to be the biggest year yet.
The beauty of designing your own ring lies in complete creative control. You’re not limited to what’s sitting in a jewelry case—you choose the metal, the width, the finish, the engraving, even the gemstones if you want them. More importantly, you’re creating something with genuine meaning. A band you designed yourself carries emotional weight that mass-produced jewelry simply can’t match. And here’s what most people don’t realize: custom doesn’t always mean expensive. Many DIY methods cost less than buying comparable pieces retail, especially when you’re willing to put in a few hours of work.
This guide walks you through seven distinct approaches to designing your own band ring, from beginner-friendly kits requiring zero technical skill to professional-grade tools for serious crafters. Each method suits different budgets, skill levels, and design goals—by the end, you’ll know exactly which path matches your vision.
Quick Comparison: 7 Ways to Design Your Own Band Ring
| Method | Best For | Difficulty | Price Range | Timeline |
|---|---|---|---|---|
| Ring Making Kits | Complete beginners | Easy | $25-$60 | 1-3 hours |
| Metal Stamping | Personalization lovers | Easy-Medium | $30-$80 | 2-4 hours |
| Ring Mandrel Tools | Size customization | Medium | $15-$45 | 1-2 hours |
| Sterling Silver Blanks | Stone setters | Medium | $8-$25 per blank | 3-5 hours |
| Resin Ring Molds | Creative designers | Easy-Medium | $12-$35 | 24-48 hours cure time |
| Online Ring Builders | Tech-savvy shoppers | Easy | $200-$2000+ | 2-4 weeks |
| Professional CAD Tools | Serious jewelers | Advanced | $500-$3000+ | Varies |
Looking at this comparison, beginners get the most value from complete ring making kits—everything’s included and you’ll have a wearable ring in an afternoon. If personalization matters more than complexity, metal stamping kits deliver professional-looking results without the learning curve of advanced metalwork. Budget-conscious crafters should note that resin molds offer the lowest per-ring cost once you’ve bought the initial supplies, though cure time means you won’t have instant results like with wire-wrapping kits.
💬 Just one click — help others make better buying decisions too! 😊
Top 7 Products for Designing Your Own Band Ring: Expert Analysis
1. Selizo Ring Making Kit with 28 Colors Crystal Beads
What immediately stands out about this kit is the sheer volume of materials—1,660 pieces including 28 different crystal bead colors, jewelry wire in three finishes (silver, gold, rose gold), and all necessary tools like pliers and a ring sizer. The wire comes in 24-gauge and 20-gauge thicknesses, which gives you flexibility between delicate wrapping and sturdy structural work. This matters because thicker wire holds stones more securely but requires more hand strength to manipulate.
In my assessment, this kit targets the wire-wrapping crowd specifically—people who want to create bohemian-style rings with visible wire spirals and wrapped gemstones. The crystal selection is genuinely impressive for the around $30-$40 range, and customers consistently mention that the quality exceeds expectations for a beginner kit. The ring sizer tool inclusion is smart; most first-timers underestimate how crucial accurate sizing is.
What customers appreciate most is the instant gratification—you can make your first ring within an hour of opening the box. The instructions could be clearer (a common complaint across these kits), but YouTube tutorials fill that gap easily. The main limitation is style range: if you’re dreaming of a smooth, polished metal band, wire wrapping won’t deliver that aesthetic.
Pros:
✅ Massive material selection (28 bead colors)
✅ Three wire finishes for versatility
✅ Includes ring sizer and quality pliers
Cons:
❌ Limited to wire-wrap style only
❌ Instructions lack detailed steps
Value Verdict: Around $30-$40 — exceptional value for beginners who want multiple design attempts included.
2. ImpressArt Basic Metal Stamping Kit
This is where personalization gets serious. The ImpressArt kit includes 3mm uppercase letter stamps (A-Z), an ergonomically designed brass hammer, a steel bench block, and practice aluminum blanks. What separates ImpressArt from cheaper alternatives is metallurgy—their stamps use hardened steel rated for thousands of impressions without dulling. I’ve seen budget stamps fail after 50-100 hits, leaving inconsistent letter depths.
The Ergo-Angle hammer design isn’t marketing fluff—the angled head genuinely promotes deeper, more even impressions compared to standard jeweler’s hammers. This matters tremendously when you’re stamping harder metals like sterling silver or brass. The weight distribution helps beginners achieve professional-looking results without years of practice developing consistent hammer strikes.
Customer feedback reveals this kit works brilliantly for names, dates, coordinates, and short quotes on rings. The 3mm letter size hits a sweet spot—large enough to read clearly on narrow bands but small enough for multi-word messages. One practical consideration: you’ll need to purchase metal blanks separately since the practice blanks run out quickly. Budget an extra $15-$25 for additional stamping blanks if you’re planning multiple rings.
Pros:
✅ Professional-grade hardened steel stamps
✅ Ergonomic hammer for consistent results
✅ Includes steel bench block (essential tool)
Cons:
❌ Stamps aren’t labeled on sides (learning curve)
❌ Limited practice blanks included
Value Verdict: In the $60-$80 range — premium pricing justified by tool longevity and result quality.
3. Accmor Ring Sizer Mandrel Measuring Tool Kit
Here’s the unsung hero of custom ring making. This aluminum alloy mandrel displays four international sizing systems (US 2-15, HK, Japanese, European), plus includes a 31-piece stainless steel finger gauge set. The mandrel’s graduated surface allows precise size checking, while the finger gauges let you measure your exact size before starting any project.
What most DIY ring makers overlook is that comfort fit varies dramatically between ring styles. A 5.5mm wide band feels tighter than a 2mm band at the same size, and wood inlays or resin can shift internal dimensions slightly during curing. This kit prevents the heartbreak of spending hours on a ring only to discover it doesn’t fit properly. The included rubber mallet (in upgraded versions) allows gentle size adjustments on softer metals without marring the surface.
Professional jewelers use tools like this daily, and at around $15-$30, it’s accessible for hobbyists too. One user insight worth noting: the mandrel works for checking rings but shouldn’t be used for aggressive ring stretching—that requires specialized equipment. For custom ring making, its value lies in accurate measurement and gentle reshaping of slightly mis-sized pieces.
Pros:
✅ Four international sizing systems
✅ Durable aluminum alloy construction
✅ 31-piece finger gauge set included
Cons:
❌ Not suitable for significant ring stretching
❌ Some models lack hammer
Value Verdict: Around $15-$30 — essential tool that pays for itself on your first project by preventing sizing mistakes.
4. JKEIO 925 Sterling Silver Adjustable Ring Blanks
These adjustable prong-style blanks represent a different philosophy entirely—you’re starting with a professional-quality sterling silver base and customizing it with your choice of stones. The 925 sterling silver stamp guarantees authenticity, and the adjustable band (typically fitting sizes 7-9) removes sizing stress. The bezel settings come in various shapes—8mm round, 10x14mm teardrop, 4x6mm oval—each designed for specific cabochon or gemstone dimensions.
What makes these blanks exceptional is the prong quality. Cheaper versions use thin, easily-bent prongs that won’t securely hold stones. JKEIO’s substantial prongs grip firmly while still allowing stone insertion without jeweler’s tools. This matters enormously if you’re working with valuable stones—a lost gemstone because of weak prongs is an expensive lesson.
The gold plating options (14k gold over sterling, rose gold) give you color variety without solid gold pricing. Customer reviews consistently mention that the plating holds up well to daily wear, though any plated jewelry eventually needs replating after years of friction. For someone wanting to create a custom ring using an heirloom stone or special gemstone purchase, these blanks deliver professional-looking results without the cost of custom fabrication.
Pros:
✅ Authentic 925 sterling silver
✅ Adjustable sizing (no measuring stress)
✅ Strong prongs secure stones firmly
Cons:
❌ Gemstones sold separately
❌ Plating will wear over time
Value Verdict: Around $8-$18 per blank — professional quality at reasonable pricing for stone-setting projects.
5. DEUXPER Sandalwood Ring Craft Kit
Natural material rings occupy a fascinating niche—they’re distinctly different from metal bands and carry an organic warmth that resonates with eco-conscious buyers. This kit includes six sandalwood ring blanks in various wood grains, plus sanding tools, finishing supplies, and carving implements. The sandalwood itself is aromatic and develops a beautiful patina with wear.
What’s particularly clever about this kit is the hybrid approach: you shape and finish the wood, then can add inlays of resin, metal wire, or crushed stone for personalization. The wood is pre-cut to ring dimensions, so you’re refining and customizing rather than starting from raw lumber. This drastically reduces the skill barrier—you don’t need a lathe or advanced woodworking equipment.
Customers describe the process as meditative and surprisingly forgiving. Wood sands down easily if you make mistakes, unlike metal where errors are permanent. The main consideration is durability: wooden rings need occasional oiling (included oil recommendations) and shouldn’t be worn during hand-washing or swimming. For someone seeking a unique, nature-connected band rather than traditional jewelry, this kit delivers genuine satisfaction. The tactile process of shaping wood creates a deeper connection to the finished piece than clicking “order” on a website.
Pros:
✅ Natural, eco-friendly materials
✅ Forgiving for beginners
✅ Aromatic sandalwood with character
Cons:
❌ Requires maintenance (oiling)
❌ Not suitable for water exposure
Value Verdict: Around $25-$35 — unique alternative to metal bands with therapeutic crafting process.
6. FUNSHOWCASE Resin Ring Silicone Mold 24-Count
Resin rings exploded in popularity because they allow preservation of meaningful items—dried flowers from a wedding bouquet, sand from a memorable beach, ashes from a loved one, wood shavings from a childhood home. This 24-cavity mold covers a wide size range (typically US sizes 5-14) and creates smooth, professional-looking bands that rivals $100+ retail rings.
The silicone quality determines success here. FUNSHOWCASE uses food-grade silicone that releases cured resin cleanly without sticking or tearing. Cheaper molds often require prying and can damage finished rings during demolding. The transparency of these molds lets you monitor bubble formation during the pour—critical for professional results since trapped bubbles ruin the crystal-clear effect resin artists chase.
Here’s what most beginners don’t anticipate: resin crafting has a learning curve around mixing ratios, pot life, and cure conditions. But once you’ve mastered the basics (honestly, three to four practice rings), the creative possibilities become nearly infinite. You can layer different colors, suspend objects at specific depths, add metallic pigments, even embed LED micro-lights. Customers consistently mention the therapeutic aspect of resin pouring and the pride of wearing something genuinely one-of-a-kind.
Pros:
✅ 24 size options in one mold
✅ Food-grade silicone releases cleanly
✅ Transparent for bubble monitoring
Cons:
❌ Requires separate resin purchase
❌ 24-48 hour cure time per ring
Value Verdict: Around $15-$25 — excellent investment for anyone interested in memorial or nature-inclusion rings.
7. Cousin DIY Stamp & Go Metal Stamping Kit
This portable stamping solution targets crafters who want professional results without hauling around heavy equipment. The kit includes uppercase letters, numbers 0-9, ampersand symbol, and a clever driver tool that holds stamp bits securely. What differentiates this from traditional stamping is the bit system—instead of individual letter stamps, you insert letter bits into the driver, which guides straight alignment.
The portability factor shouldn’t be underestimated. Traditional metal stamping requires a heavy steel block (5-10 pounds) for sound absorption and stability. This kit’s compact design lets you stamp at craft fairs, friend’s houses, or while traveling. The tradeoff is slightly less impression depth compared to full-sized stamps with hefty hammers, but for softer metals like aluminum and copper, results are entirely professional.
Customer feedback reveals this works particularly well for pet ID tags, keychain personalization, and thin metal charms that hang from rings rather than forming the ring itself. For band rings specifically, you’d stamp metal blanks separately then attach them to ring bases. The learning curve is gentler than traditional stamping since the driver guides alignment automatically. If you’re making rings as gifts or selling them at local markets, this kit’s portability becomes a genuine competitive advantage.
Pros:
✅ Portable without heavy steel block
✅ Driver tool ensures straight alignment
✅ Includes storage case
Cons:
❌ Less depth than traditional stamping
❌ Best for softer metals only
Value Verdict: Around $30-$45 — smart choice for mobile crafters or those with limited workspace.
How to Choose Between Physical Kits and Online Ring Builders
The decision between hands-on crafting and digital design fundamentally depends on what “custom” means to you. Physical kits deliver tactile satisfaction—you’re shaping, stamping, polishing with your own hands. There’s meditative value in the process itself, and you learn transferable jewelry-making skills. The finished piece carries the story of creation, complete with minor imperfections that prove it’s genuinely handmade.
Online ring builders like CustomMade, StoneAlgo, or Kay Jewelers’ customization tool operate differently. You’re making design decisions (metal type, width, finish, engraving text, stone placement) through an interface, then professional jewelers execute the fabrication. This delivers precision impossible for hobbyists—perfectly uniform engraving depth, complex stone settings, metals like platinum that require specialized equipment. The tradeoff is cost (typically $200 minimum, often $500-$2000+) and losing the hands-on experience.
When Physical Kits Win:
- Budget under $100 total — DIY materials cost less than professional fabrication
- You enjoy crafting — the process is part of the value, not just the result
- You want multiple attempts — kits let you practice without per-piece charges
- Immediate timeline — you control the pace, no waiting for jeweler schedules
- Learning investment — you’re building skills for future projects
When Online Builders Win:
- Complex designs — intricate stone patterns, channel setting, complex engraving
- Precious metals — working with gold or platinum requires professional equipment
- Zero mistakes tolerated — professional fabrication eliminates amateur errors
- High-value stones — jewelers have insurance and expertise for expensive gems
- Resale considerations — professionally made rings hold value better
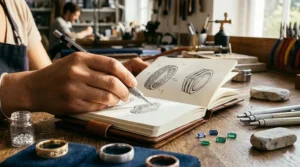
The hybrid approach is gaining popularity: design digitally using free tools like Tashvi AI or Pencil Design for visualization, then execute simpler versions with physical kits or hire fabrication for complex elements. This maximizes creative control while acknowledging skill limitations.
Real-World Scenario: Choosing Your Design Method
Let me walk through three common situations to illustrate decision-making:
Scenario 1: College Student’s Anniversary Gift ($50 budget, 2 weeks)
Rachel wants a meaningful gift for her girlfriend’s one-year anniversary. Budget is tight but sentiment matters enormously.
Best choice: Selizo wire-wrapping kit with her girlfriend’s birthstone beads. The $35 kit lets her create multiple designs, practice until perfect, and include a personal touch like wrapped initials. Timeline works since she can craft over weekends without rush fees.
Scenario 2: Professional’s Wedding Band (Budget $800, wants unique design)
Marcus needs a wedding band that reflects his carpentry background without looking unprofessional at the office.
Best choice: Online builder (CustomMade) with wood inlay specifications. He can incorporate actual wood from his first woodworking project into a tungsten or titanium band. The $600-$800 professional fabrication ensures daily-wear durability that DIY wooden rings can’t match, plus he gets design input without metalworking skills.
Scenario 3: Retiree’s Memorial Project (Budget flexible, meaningful process matters)
Joan wants to preserve her late husband’s ashes in a ring she’ll wear daily.
Best choice: Resin ring mold kit plus professional finishing. She pours the resin herself (therapeutic process, personal connection) using the FUNSHOWCASE molds, then pays a local jeweler $50-$100 to add a protective clear coat and professional polish. This combines hands-on meaningful work with professional durability.
The pattern? Match the method to what you value most—cost, timeline, skill development, sentimentality, or professional finish. There’s no universal “best” method, only the best method for your specific situation.
Common Mistakes When Designing Your Own Band Ring
After reviewing hundreds of beginner projects and customer feedback, certain pitfalls appear repeatedly. Here’s what trips up newcomers and how to avoid these expensive lessons:
Mistake 1: Ignoring Size Fluctuation
Fingers swell in heat and shrink in cold. That ring fitting perfectly in your air-conditioned house might be uncomfortably tight after a summer walk.
Solution: Size up by 0.25-0.5 sizes if making a wide band (5mm+) since width creates more contact surface. Test fit at different times of day and temperatures before finalizing.
Mistake 2: Skipping Material Testing
Skin sensitivities aren’t obvious until you’ve worn a ring for hours. Nickel allergies affect 10-20% of people but cheaper “silver-colored” rings often contain it.
Solution: Buy proven hypoallergenic materials first time—sterling silver (marked .925), titanium, or platinum. The $5-$10 premium over mystery metal prevents allergic reactions and wasted effort.
Mistake 3: Underestimating Finishing Time
Raw rings look amateur. Professional appearance comes from proper sanding, polishing, and sealing. Many beginners spend hours on design, then rush the finish and end up disappointed.
Solution: Budget 30-50% of your total time for finishing. Progress through sandpaper grits systematically (220 → 400 → 600 → 1000 grit minimum). Apply proper sealant for material type—resin needs UV-resistant clear coat, wood needs penetrating oil, metal needs jeweler’s polish.
Mistake 4: Copying Complex Designs First
Instagram and Pinterest showcase advanced work that took years of skill development. Jumping straight to those designs guarantees frustration.
Solution: Master one technique thoroughly before combining multiple methods. Make five wire-wrapped rings before attempting wire wrapping plus resin casting plus metal stamping in one piece.
Mistake 5: Using Wrong Adhesives
Generic superglue fails on jewelry regularly—it yellows, becomes brittle, and breaks under wear stress.
Solution: Use jewelry-specific adhesives. E6000 for metal-to-stone bonds, two-part epoxy for high-stress joins, UV resin for gemstone setting. The $5-$8 cost of proper adhesive is insurance against hours of wasted work.
Design Your Own Band Ring vs. Traditional Ring Shopping
Understanding what you’re gaining and losing helps set realistic expectations:
Customization Advantages:
- Absolute uniqueness — your design won’t appear on anyone else
- Meaningful process — creation becomes part of the ring’s story
- Budget flexibility — DIY can be cheaper or you can invest in premium materials
- Skill development — you’re learning jewelry-making fundamentals
- Iteration freedom — make multiple versions until it’s exactly right
Traditional Shopping Advantages:
- Immediate availability — walk out wearing it today
- Professional finish — machine precision and expert craftsmanship
- Warranty protection — most jewelers offer repair/replacement guarantees
- Resale value — designer or brand name rings hold value better
- Zero learning curve — no research, practice, or skill acquisition required
The surprising insight from experienced crafters: the first custom ring takes 10x longer than expected, but the fifth takes half the time of buying retail. If you’re making one ring for a specific occasion, buying may be more efficient. If you’re entering jewelry-making as a hobby or small business, custom design has compounding returns on your time investment.
Long-Term Cost & Maintenance of Custom Band Rings
Let’s talk honestly about total cost of ownership because initial material costs don’t tell the full story:
DIY Ring Costs (5-Year Perspective):
Initial Investment: $50-$150 for quality tools and materials
Materials per ring: $5-$30 depending on style (wire-wrap cheapest, precious metal most expensive)
Skill development time: 10-20 hours across first five rings
Maintenance: Minimal for durable materials (metal, resin with proper sealing)
Replacement frequency: Every 2-5 years for softer materials or heavy wear
Total 5-year cost: $150-$400 including 3-5 rings made
Professional Custom Ring Costs:
Single ring purchase: $300-$2000+ depending on metal and complexity
Design iterations: Usually free within reason
Professional finish: Included in price
Warranty: 1-2 years typical
Maintenance: Annual inspection/cleaning recommended ($50-$100)
Total 5-year cost: $350-$2200 for one ring
Material-Specific Maintenance Reality:
Resin rings need annual re-coating if worn daily ($15 in materials, 1 hour time)
Wood rings require monthly oiling and shouldn’t be worn in water
Silver rings tarnish naturally—budget 15 minutes monthly for polishing
Wire-wrapped rings can snag on clothing and need periodic tightening
Stone-set rings risk stone loss without periodic prong checking
The value proposition shifts based on use case. A daily-wear wedding band justifies professional fabrication’s durability premium. Fashion rings rotated seasonally make DIY’s lower per-piece cost attractive. Anniversary bands with extreme sentimental value might warrant professional work regardless of cost.
Step-by-Step: Your First Custom Band Ring
Let me walk you through creating a simple but impressive first project—a wire-wrapped band with birthstone—using the Selizo kit methodology:
Step 1: Sizing (10 minutes)
Use the included ring sizer to find your exact size. Wrap the metal sizer around your finger—it should slide over your knuckle with slight resistance but not squeeze. Note the number. Add 0.25 size for wire-wrapped rings since wraps add bulk.
Step 2: Wire Preparation (15 minutes)
Cut an 18-inch length of 20-gauge wire. This excess allows mistakes and experimentation. Don’t cut shorter trying to save wire—you’ll regret limiting your options mid-project. Thread your chosen birthstone beads onto the wire center, leaving equal lengths free on both sides.
Step 3: Base Mandrel Wrapping (20 minutes)
Wrap the bare wire sections around your ring mandrel at the size mark you noted. Make 3-4 tight coils on each side of the stone position. Use pliers to pull wire taut—loose coils create weak rings that deform easily. The coils form your band foundation.
Step 4: Stone Securing (25 minutes)
This is where wire-wrapping becomes art. Use finer 24-gauge wire to wrap around the stone and base coils, creating a secured setting. Common patterns: spiral wrap (circles around stone), basket weave (crossing wires), or cage setting (wrapped frame). YouTube tutorials demonstrate each style clearly—watch two or three before starting so you understand the motions.
Step 5: Wire Ends (15 minutes)
Trim excess wire with flush cutters, leaving 3-4mm tails. Use round-nose pliers to curl these tails into decorative spirals that tuck against the band. This prevents sharp edges from scratching your finger and looks intentional rather than unfinished.
Step 6: Polishing (10 minutes)
Rub the entire ring with a jewelry polishing cloth to remove oils, enhance shine, and smooth any rough wire edges. This final step elevates the piece from “craft project” to “jewelry.” Don’t skip it even if you’re tired of working—the visual difference is dramatic.
Total time: 95 minutes for first attempt. Your second ring will take 45-60 minutes as muscle memory develops. By the fifth ring, you’ll complete these in 30 minutes and can start experimenting with complex patterns.

Features That Actually Matter (And Those That Don’t)
Marketing around custom ring tools emphasizes dozens of features. Here’s what genuinely impacts your results versus what sounds impressive but rarely matters:
Features That Actually Matter:
Stamp hardness (for metal stamping) — Hardened steel lasts for thousands of impressions. Unhardened steel dulls after dozens, creating inconsistent letter depths that look amateur. Worth paying 30-40% premium.
Resin mold silicone quality — Food-grade silicone releases cured resin cleanly. Industrial silicone tears easily and sticks, destroying your work during demolding. This isn’t optional—cheap molds guarantee frustration.
Ring mandrel sizing accuracy — Precision-graduated mandrels ensure your size 7 is actually size 7. Cheap mandrels have sloppy markings leading to rings that don’t fit properly. Check reviews mentioning “accurate sizing” before buying.
Wire gauge variety — Having both thick (18-20 gauge) and thin (24-26 gauge) wire lets you build structure and add details. Single-gauge kits limit your design options severely.
Adjustable ring blank prong strength — Substantial prongs hold stones securely. Flimsy prongs bend during setting or lose stones during wear. This is literally the difference between keeping and losing valuable gemstones.
Features That Don’t Matter Much:
Dozens of bead colors — You’ll gravitate toward 5-6 favorites. Having 50 colors sounds appealing but creates decision paralysis and most colors sit unused.
Brand name on basic tools — A $15 Accmor ring mandrel performs identically to a $40 designer mandrel if both are aluminum alloy with accurate markings. Don’t overpay for logo.
Fancy carrying cases — Nice for aesthetics, irrelevant for functionality. Basic plastic cases protect tools just as well as leather ones. Save money here, spend it on better materials.
Multiple stamp fonts — Stick with one legible font (typically sans-serif) until you’ve mastered consistent depth and alignment. Multiple fonts tempt beginners to attempt complex designs before basics are solid.
Number of mold cavities — Five different ring sizes in one mold cover most needs (6, 7, 8, 9, 10). Having 20 sizes sounds comprehensive but you’ll realistically use 3-4 repeatedly.
Focus purchasing decisions on features affecting result quality and durability. Ignore features creating variety you won’t actually use. The $50 kit with excellent core tools beats the $80 kit with mediocre core tools plus lots of extras every single time.
Safety Considerations and Regulations
Custom jewelry making involves tools and materials requiring basic safety awareness. Most hazards are easily managed with simple precautions:
Metal Working Safety:
Hammer strikes — Miss the stamp and you’ll hit fingers. Always stabilize blanks completely, strike decisively (not timidly), wear safety glasses in case metal chips fly. Band-aids for minor nicks, ice for hammer-strike bruising.
Sharp wire ends — Flush-cut wire leaves sharp points that scratch. File or curl all exposed ends before wearing. I’ve seen countless scratched necks from forgotten wire points on pendants—rings held closer to body make this even more critical.
Metal dust from sanding — Use a damp cloth to capture metal particles during sanding. Don’t blow dust away (inhaling metal particles) or sand over carpets (impossible to vacuum tiny metal fragments). Wet sanding over a dedicated workspace solves both issues.
Resin Safety:
Ventilation — Uncured resin releases fumes that require proper ventilation. Work in ventilated areas or use respirators if working regularly. The sweet smell is chemical off-gassing, not harmless. Headaches during projects indicate insufficient ventilation.
Skin contact — Resin sensitivity develops over time. First-time users feel fine; repeated exposure causes allergic reactions. Always wear nitrile gloves (latex gloves allow resin penetration). Wash hands thoroughly after each session even with gloves.
UV exposure — UV resin cures under intense UV light. Don’t stare at UV lamps during operation. Brief glances won’t blind you but extended viewing damages retinas. Position lamps away from eye level.
Material Regulations:
Nickel content — EU regulations restrict nickel in jewelry touching skin (under 0.5 micrograms per square centimeter per week). US has no federal restrictions but many states limit it. If selling rings, verify your metals comply with destination regulations.
Precious metal purity claims — Calling a ring “sterling silver” legally requires 92.5% silver content (.925 stamp). Misrepresenting metal content violates FTC regulations. Only claim materials you can document—”silver-colored” is legally safe, “sterling silver” requires proof.
Gemstone treatment disclosure — Enhanced, heated, or filled stones must be disclosed if selling. Natural vs. lab-created distinction matters legally. For personal use there’s no regulation, but accurate disclosure protects you if selling custom pieces.
None of this should discourage you—millions of people create custom rings safely. Just treat jewelry-making tools with the same respect you’d give any craft equipment. The few minutes of setup time for ventilation and protective gear prevents both immediate injury and long-term health issues.
FAQ: Your Top 5 Design Your Own Band Ring Questions Answered
❓ How long does it take to design your own band ring from start to finish?
❓ What's the most beginner-friendly method for designing a custom ring?
❓ Can I design my own wedding band or should I hire a professional?
❓ How much does it actually cost to design your own band ring?
❓ What materials work best for first-time ring makers?
Conclusion: Turning Your Band Ring Vision Into Reality
Designing your own band ring in 2026 isn’t about choosing between DIY craft kits and professional jewelers—it’s about matching method to meaning. The wire-wrapped ring you complete in an afternoon carries different value than the professionally fabricated wedding band taking four weeks. Neither is objectively better; they serve different purposes in your jewelry journey.
What I’ve learned covering this space for years is that the best custom ring strategy combines approaches strategically. Start with affordable complete kits to develop skills and confidence. Graduate to higher-quality individual components as you identify your preferred style. Then selectively hire professional fabrication for the complex elements (intricate stone setting, precious metal soldering) while doing the simpler customization yourself (selecting stones, designing layout, hand finishing).
The 2026 custom ring landscape offers unprecedented access—tools that required apprenticeships decades ago now come with beginner-friendly instructions and YouTube tutorials. Materials once limited to trade suppliers ship to residential addresses. The barrier isn’t access or cost anymore; it’s simply deciding to start. Your first ring won’t be perfect. Your second will be noticeably better. By your fifth, people won’t believe you made it yourself.
Whether you’re crafting a memorial ring preserving ashes in resin, stamping coordinates of a special place, wire-wrapping stones collected on meaningful trips, or designing a wedding band reflecting your partnership’s unique story, the tools reviewed in this guide put professional-looking results within reach. The question isn’t whether you can design your own band ring—you absolutely can. The only question is which method matches your vision.
Recommended for You
- 5 Best Fancy Color Diamond Bands 2026
- 7 Best Rainbow Gemstone Bands That’ll Transform Your Ring Stack (2026)
- 7 Best Colorful Enamel Rings That Pop in 2026
Disclaimer: This article contains affiliate links. As an Amazon Associate, I earn from qualifying purchases. If you purchase products through these links, we may earn a small commission at no additional cost to you.
✨ Found this helpful? Share it with your friends! 💬🤗